How To Check A Box In Word Documents will be discussed in this article. You may want to include checkboxes in a printable list of tasks for your employees. Or, you might need actionable checkboxes on the Word document itself so that the recipient can choose their options. But how do you do that in Microsoft Word?
Today’s “how to check a box in Word documents” tutorial will show you ways to insert checkboxes in a Word file. Let’s dig in!
How To Check A Box In Word Documents
In this article, you can know about How To Check A Box In Word Documents here are the details below;
An illustration of checkboxes for how to check a box in Word
How to Check a Box in Word: Using Bullets
Adding checkboxes in Word is really quick if you use the Bullets hack. However, the checkboxes won’t be functional. It means they’ll be static, and you can’t add checkmarks on Word but fit for printing purposes. Here’s how:
How to Check a Box in Word: Using Bullets
Select the entire list and click on the Home tab on the ribbon menu.
- Navigate to the Paragraph commands section.
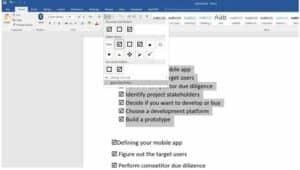
- In the Bullets command, click on the drop-down arrow.
- Choose Define New Bullet.
- How to check a box in Word the Bullets method
- Click the Symbol option on the dialog box that appears.
- You may choose a blank rectangle or a rectangle with a check mark.
- Select OK, and the Symbol dialog box will close.
- Click OK again on the Define New Bullet window.
That’s about it! You’ve successfully added rectangle boxes or check-marked rectangles beside the task, item, or answer list. Also check Recover Deleted Pages and Post in WordPress
How to Check a Box in Word: Using Content Control
The above-mentioned method only adds static boxes and checkboxes. You can add a check mark if you’re editing the document on Word. But, if you want actionable checkboxes for live composing or surveys, follow these steps:
- Open a Word file and populate that with a list of items.
- Click on the File tab & pick Options from the left navigation pane.
- On the Word Options dialog box, pick Customize Ribbon.
- You’ll discover two lists, one on the left and another on the right.
- In the right-side list, check mark the box for Developer.
- Now, click OK to close the Word Options dialog box.
Now that you’ve added the Developer tab, continue with the followings:
- You should now see your Word file with the list.
- Put the cursor on the left of the first item on the list and click on the Developer tab.
- On the Controls commands section, you’ll see a white rectangle with a blue check mark.
- Click on that to add the checkbox beside the list item.
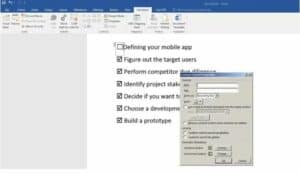
- Select the checkbox and click on Properties in the Controls commands section.
- Content Control Properties window will appear. Here, you’ll find the Checked symbol option at the bottom.
How to check a box in Word the Content Control method
- Click on Change beside the Checked symbol.
- From the Symbol dialogue box, click on the Font drop-down and select Windings.
- You’ll find the check mark box at the bottom of the Symbol window. Select it and press OK on all dialog boxes to apply the changes.
- Word will replace the default X mark with the check mark.
- You can now copy the checkbox element from the first item of the list to all the items to check a box in Word.
Note: If you add new checkboxes, check mark boxes won’t come up. You need to copy the modified checkbox. Also check keywordSpy Alternatives
Final Words
You’ve so far found two different methods of adding checkboxes in Word documents from this “how to check a box in Word” tutorial. For blank checkboxes in printed documents, you should apply the first method. On the other hand, the second method is appropriate for functional checkboxes on Word files.


